

How To Repeat Design With Blend Tool
How to create a repeating pattern in Illustrator
Need to create a seamlessly repeating patterns in Illustrator CS6 or Illustrator CC 2014? Then you're in luck. Adobe has created a tool that will make the pattern creation process both fast and easy.
When creating patterns, you have a number of options. You can make use of the patterns installed with Illustrator, draw a pattern, select a pattern from a photo or scan one in.
Use a ready-made pattern
Set up your workspace by going to Window>Workspace>Painting. To access patterns, there are several options. One is to go to the Swatches panel and once there, click on the Swatch Libraries Menu icon at the lower left.
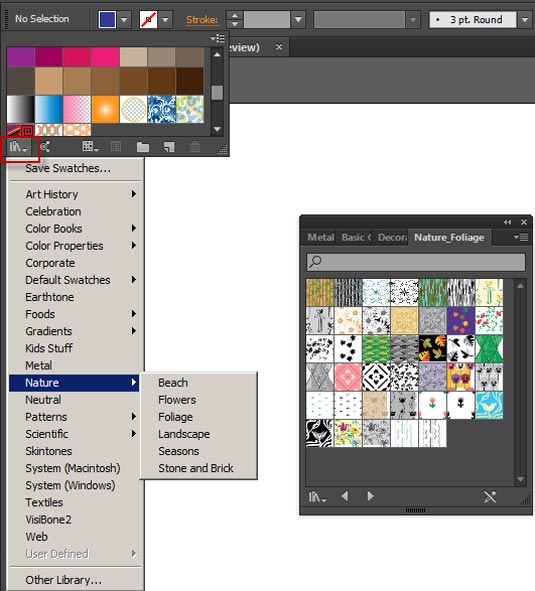
The Swatches panel at top-left, options below in the menu and the Swatch Libraries Menu panel. You can edit the patterns in Illustrator or create one from scratch.
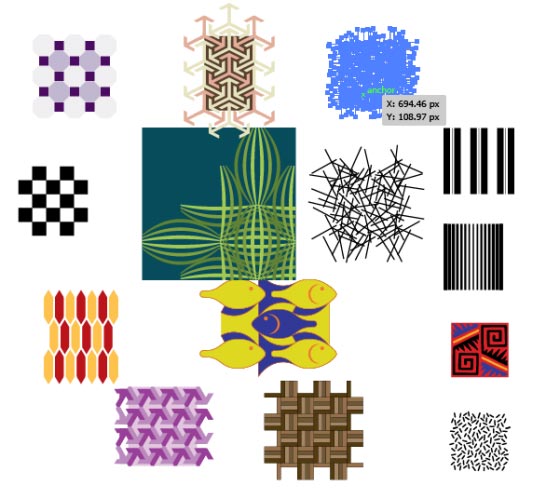
Here is an example of the various patterns that come with Illustrator.
Create a pattern from scratch
To create your own patter, click on File>New. In the New Document dialog box select Profile>Custom and the Width and Height to 300 pixels. Click on OK to accept.
Click on the Rectangle tool (M) to select it and click on the artboard. When the Rectangle dialog box comes up, click OK for the default of 100x100 pixels and draw four rectangles.
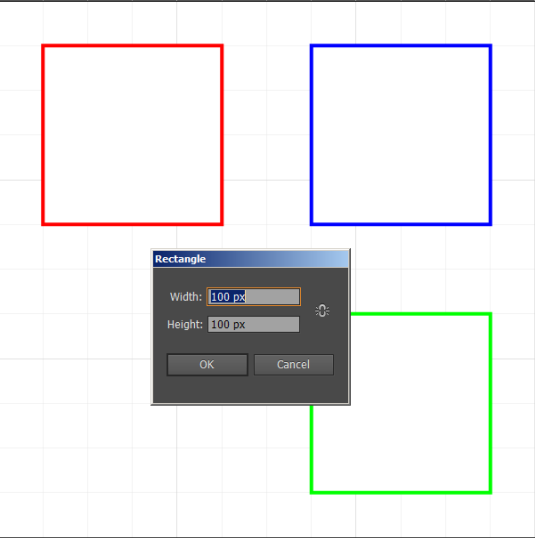
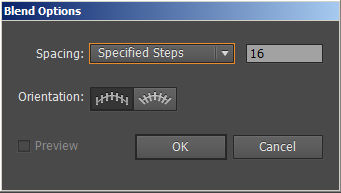
Choose any colour you wish for the stroke. Set the stroke to 2 and make sure the fill is turned off. Activate the Blend tool (W) and double-click on the artboard.
This brings up the Blend Options dialog box. Set the spacing to Specified Steps and in the parameters box, enter 16. In the orientation, choose the first option and click on OK.
With the Blend tool active, click on the top line of the red rectangle then click on the top line of the green rectangle. You should get the following result:
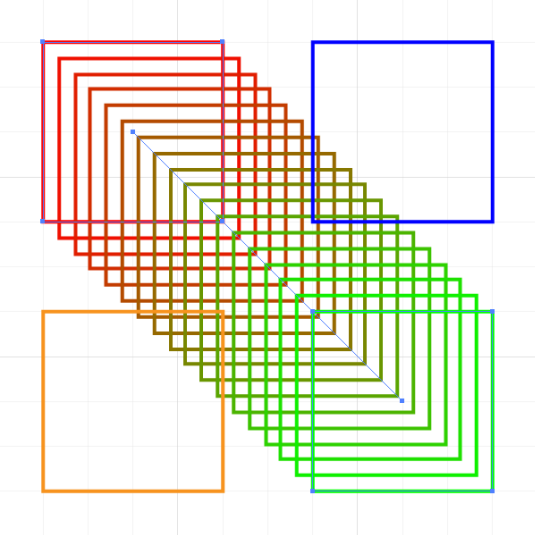
Deselect the current rectangles and repeat the same process for the blue and orange rectangles. Deselect the current rectangles and repeat the same process for the blue and orange rectangles. Your rectangles should look like this:
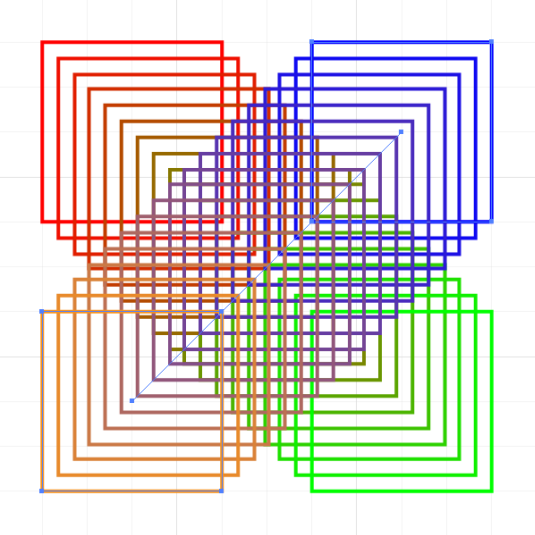
You now have a simple design to use for making a seamless pattern in Illustrator. Before you go further, select all of the rectangles and click on Object>Group (Ctrl+G) to group all the shapes together.
How to create a pattern
Now it's time to create a pattern. With the pattern group selected, click on Object>Pattern>Make.
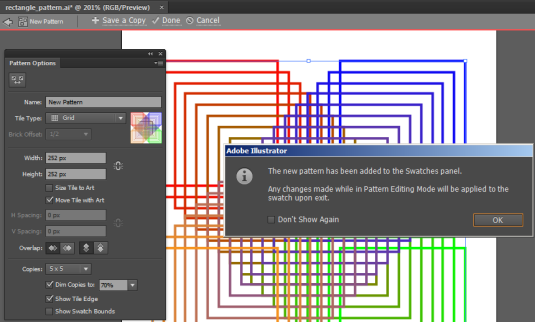
When you do so, several things happen: Your design is automatically transformed into a pattern, the Pattern Options dialog box appears and the pattern has been added to the Swatches panel.
Note that any changes applied in Pattern Editing Mode will be applied to the Swatch upon exit. Click OK to accept.
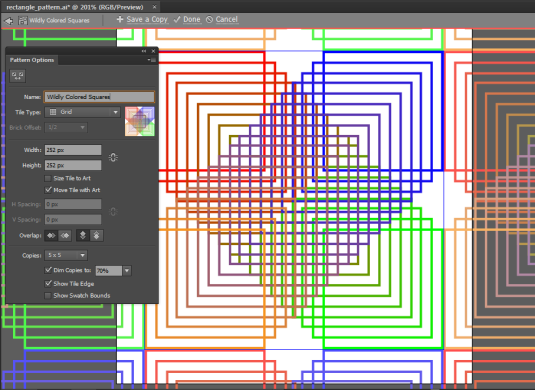
Before going further, name the pattern. After that you can begin editing. (Looking at the result, there are a lot of lines which could be overwhelming. Fortunately there is an easy fix, which we will get to in a minute.)
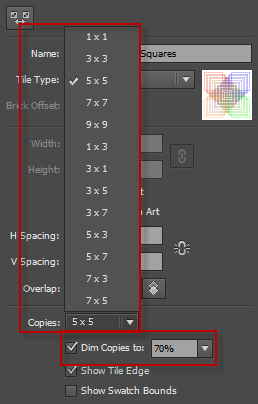
When you look at the Pattern Options dialog box you will see many options. Directly below the pattern name is the Tile Type. Your options are: Grid, Brick by Row, Brick by Column, Hex by Column, and Hex by Row.
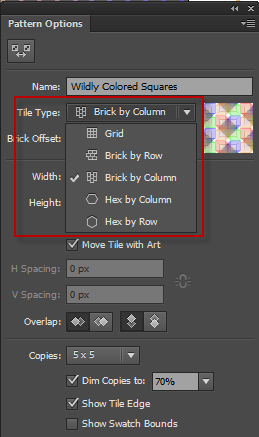
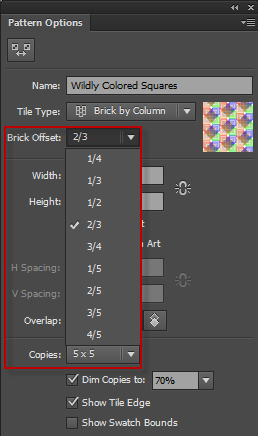
Directly below the Tile Type is the Brick Offset. To keep things simple, choosing Tile Type: Grid disables the Brick Offset.
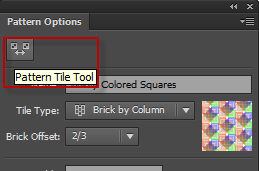
As you can see, there are many options but they may not be to your liking. If that's the case, click on the Pattern Tile Tool at the top of the Pattern options dialog box.
This brings up a blue outline with handles around the main pattern. It might be hard to see, so we will drag out the shape, which will create separation between the other patterns and make the blue outline easier to see.
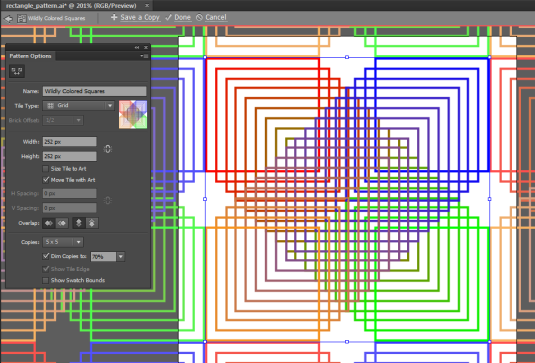
You can now see the blue outline and some space between the patterns.
Other settings

In the Pattern Options dialog box there are many more options. One of them is to size the spacing of the pattern numerically, for greater accuracy. To do so, click on the Maintain Width and Height Proportions button in the top section and enable Size Tile to Art. The copied patterns will snap back in line with the original pattern.
To create space, enter a value in the H Spacing and V Spacing parameters box. Note you can enable the Maintain Spacing Proportions button to the right of the parameters box — or not.
Here is the result:
Of the other options, the Copies popup offers many different settings, such as 5x5 (default), 7x7, 3x7, 3x3, etc. Below the Copies option is the heading>Dim Copies to. 70% is the default but you can change if the copies are close together. This will make it easier to see what is happening with the pattern.
When you are satisfied with your changes click on the Done heading at the top of your workspace. That's it.
In this tutorial we've barely scratched the surface of what you can do with patterns. There are endless possibilities, and you are only limited by your imagination. To go further, check out these tutorials:
- How to Make Seamless Pattern Repeats in Adobe Illustrator
- Create and Edit Patterns
- About Patterns
Words: Nathan Segal
Related articles
How To Repeat Design With Blend Tool
Source: https://www.creativebloq.com/adobe/repeating-pattern-illustrator-71412467
Posted by: chickfeep1992.blogspot.com
0 Response to "How To Repeat Design With Blend Tool"
Post a Comment